I can’t believe it but I actually finished the Amy Butler Ultimate Arts & Crafts Tote for my International Tote Exchange III partner tonight. The bag probably took a total of 15 or so hours with all the cutting and piecing but it was SOOO worth it. If I had another 15 hours of free time I would definitely make myself one of these. It is the Ferrari of arts & crafts totes.
I have a miniscule selection of fabrics here in Korea as I have yet to get to this “mystical” fabric market in Seoul people keep telling me about, maybe this weekend. My choices are limited to what can fit on a mall kiosk-size cart in the Base Exchange Mall. I was so lucky to stumble upon these coordinating fabrics because the pattern called for 5 different fabrics and these coordinated perfectly and my partner said she loves jewel tones.
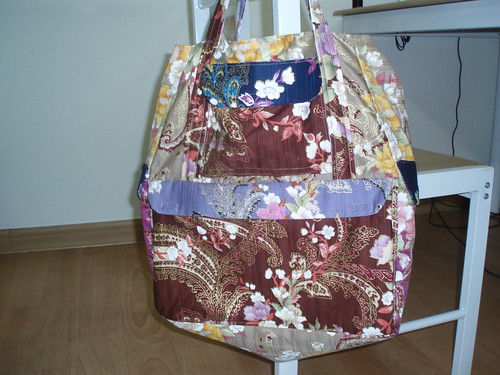
This is a pic of the front of the bag, it is very roomy and would hold a week’s worth of crafting supplies, great for car trips, it’s even big enough for magazines and projects.

This is the inside of the front flap pocket, knitting needle holders and three separate compartments for crochet needles, paint brushes, whatever you want to slide in there.

The tote back also has many pockets, the bottom pockets are compartments for circular needles, glue bottles, scissors, etc.
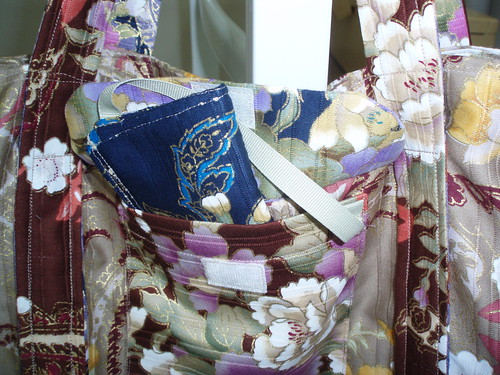
This is my favorite part – a built in needle case attached, by a ribbon, to the top pocket on the back. How clever is that, that Amy Butler, she’s a crafty girl!
There are also long pockets on either side of the bag which can hold a water bottle, wallet, cell phone, whatever else you can stuff in this puppy!
Amy’s patterns are very lengthy yet pretty simple but I must say the diagrams on this pattern were not up to her usual standards, In Stitches‘ diagrams are much better. I had difficulty with a few pictures because the piece shapes and sizes were skewed making it difficult to know which side was a top and which was a side. I also do not like how she instructs you to put the lining in, she uses the same technique for the CD holder in her In Stitches book. Instead I hemmed a 1/2″ edge on the lining and on the exterior of the bag and then matched them up and topstitched them together. It seemed a lot easier with a project this size. I would have to say that if you have 15 hours of time on your hands and are in need of a new project, make one of these, I give it 2 thumbs up!

Good for you!! What a challenge and I am certain she will love it. Nicely done!
What a great bag – great colors & all of the “nooks & crannies” sound so useful! 🙂
Also, the barettes you made are adorable.
The fabrics that you pick are so lovely together. I sm sure that she will love it.
Great job! Looks like all that work was definitely worth it.